

Table of Contents
- Start With Freshly Roasted Beans and a Burr Grinder
- How to Grind Coffee Beans for Your Brewing Method
- Easy Coffee Brewing Methods for Beginners
- The Coffee-to-Water Ratio That Gets It Right
- How Many Scoops of Coffee Per Cup (and Why Weight Wins)
- Water Temperature, Quality, and the Bloom Phase
- Troubleshooting Flavor: Sour, Bitter, or Weak
- Budget Gear vs. Premium Gear: What Actually Matters
- Frequently Asked Questions
Last Updated: October 12, 2026
Start With Freshly Roasted Beans and a Burr Grinder
Learning how to brew fresh coffee at home starts with two things: fresh beans and a burr grinder.
Freshness fades fast: once roasted, beans lose the gases and oils that carry flavor. Whole beans hold those qualities far longer than pre-ground.
Fresh coffee is coffee brewed within a few weeks of its roast date, using whole beans ground moments before the water hits them. That definition matters more than any gadget you buy.
Why Bean Freshness Changes Everything
Roasted beans release carbon dioxide for days after roasting, that gas is part of what makes a cup taste alive. Grind too early and the surface area explodes, so the beans go flat fast.

A few habits protect freshness:
- Buy whole bean, not pre-ground
- Check for a roast date, not just a best-by date
- Store beans in an airtight container away from light and heat
Skip the freezer for daily use. Temperature swings pull moisture into the beans.
How to Grind Coffee Beans for Your Brewing Method
Grind size is the single biggest lever you control at home. When you grind coffee beans, you decide how fast water pulls flavor out. Too coarse and the water runs past without picking up much; too fine and it over-extracts into bitterness.
The rule is simple: match the grind to the brew time. Longer contact needs coarser grounds. Shorter contact needs finer ones.
Grind Size Chart: From Coarse to Fine
Here is how the main grind sizes line up with common methods:
| Grind Size | Texture | Best Method | Brew Time |
|---|---|---|---|
| Coarse | Like sea salt | French press | 4 minutes |
| Medium-coarse | Like rough sand | Drip coffee | 4-5 minutes |
| Medium | Like table salt | Pour-over | 2-3 minutes |
| Medium-fine | Like fine sand | AeroPress | 1-2 minutes |
| Fine | Like powder | Espresso | 25-30 seconds |
A burr grinder crushes beans between two burrs for an even result. A blade grinder chops and leaves a mix of dust and chunks, which brews unevenly. If you buy one piece of gear, make it the burr grinder.

Easy Coffee Brewing Methods for Beginners
Three methods cover almost everyone: pour-over, French press, and drip. None require barista training, and each rewards good beans and a decent grind.
Pour-Over, French Press, and Drip Compared
Pour-over gives you the cleanest cup. You control the pour, so you control the extraction, about three minutes of hands-on time.
French press is the most forgiving: add coarse grounds, pour hot water, wait four minutes, press.
Drip coffee is the easiest for busy mornings. Load the basket, press start, walk away.
| Method | Hands-On Time | Body | Best For |
|---|---|---|---|
| Pour-over | 3 minutes | Light and clean | Tasting single origins |
| French press | 4 minutes | Full and rich | Slow mornings |
| Drip | 1 minute | Medium | Busy weekdays |
Immersion brewing (French press) soaks the grounds in water; percolation (drip and pour-over) runs water through the bed.

The Coffee-to-Water Ratio That Gets It Right
The coffee-to-water ratio is the difference between a cup you savor and one you pour down the sink.
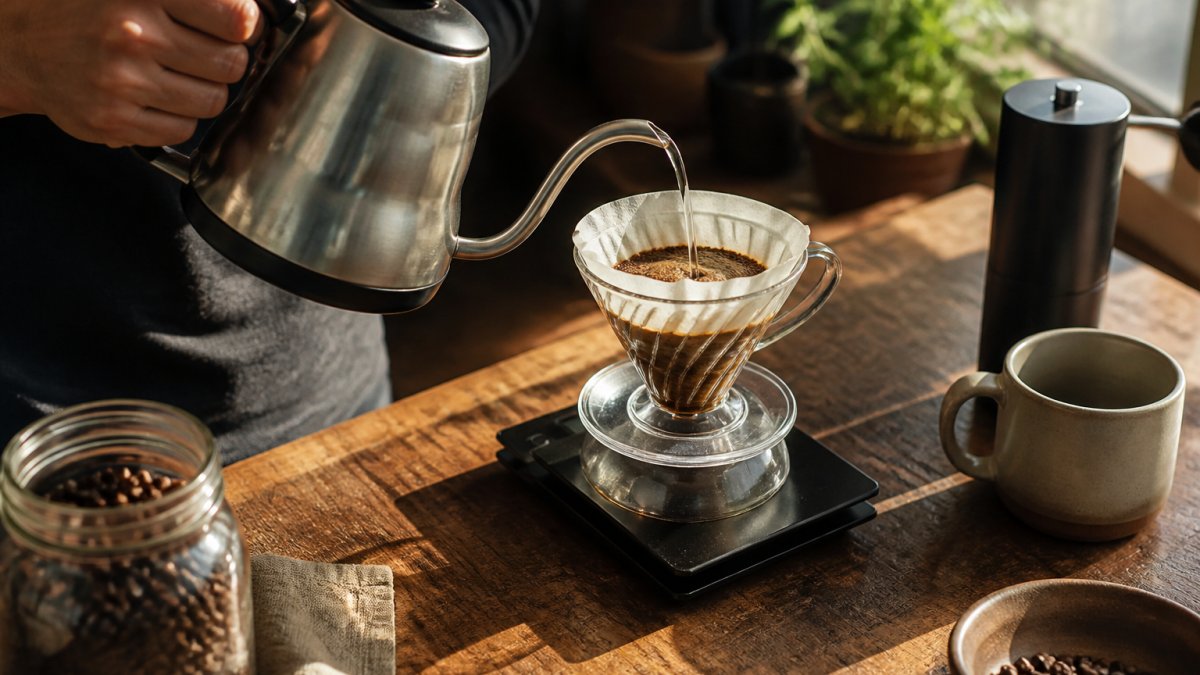
Here is what that looks like in practice:
| Cups | Coffee | Water |
|---|---|---|
| 1 | 15 g | 240 g |
| 2 | 30 g | 480 g |
| 4 | 60 g | 960 g |
Want it stronger? Move toward 1:15; lighter? Move toward 1:17. Change one thing at a time so you know what worked.
A scale beats a scoop every time. Volume varies with grind and bean density, so weighing removes the guesswork.
How Many Scoops of Coffee Per Cup (and Why Weight Wins)
A common question is how many scoops of coffee per cup you need. Short answer: about two level tablespoons per 6 oz cup.
Scoops are unreliable. A heaped tablespoon of coarse grounds and a level tablespoon of fine grounds are not the same amount of coffee.
If you only have a scoop, here is a rough guide:
- 1 cup (6 oz): 2 level tablespoons
- 2 cups: 4 level tablespoons
- 4 cups: 8 level tablespoons
For a 12 oz mug, use about 4 tablespoons or 20 to 22 grams. Adjust from there based on taste.
Water Temperature, Quality, and the Bloom Phase
Water makes up roughly 98% of your cup, so it deserves more attention than most home brewers give it. The target brew temperature is 195°F to 205°F (90°C to 96°C). Just off the boil is close enough, but a kettle with a thermometer removes the guesswork.
Why Temperature Is a Lever, Not a Rule
Heat drives extraction. Cooler water pulls sweetness and acidity first and leaves heavier compounds behind, so a cup brewed at 185°F tastes thin and sour; water near boiling can push past the sweet spot into bitterness. The 195-205°F window is where most beans give up flavor evenly. Dark roasts do better at the lower end; light roasts often need the higher end.
The Bloom, Explained
Freshly roasted beans hold carbon dioxide from roasting. It lasts about 30 seconds and is one of the clearest freshness signals you have: fresh beans bloom actively and smell sweet and bready, while older beans barely move.
A simple bloom routine:
- Pour just enough water to wet all the grounds (roughly twice the coffee's weight)
- Wait 30 seconds while the bed settles
- Continue your normal pour
Skipping the bloom is not fatal, but it traps gas that interferes with even extraction, showing up as a flat or uneven cup.
Water Chemistry: The Part Most Guides Skip
The Specialty Coffee Association publishes water standards most roasters and cafés build around. The short version: water needs some minerals to extract coffee well, but not too many. The two numbers that matter most are total dissolved solids (TDS) and hardness.
- TDS measures everything dissolved in the water. Very low TDS (distilled or reverse-osmosis) tastes flat and extracts poorly because there are no minerals to bind with coffee compounds.
- Hardness comes mostly from calcium and magnesium. Magnesium helps pull fruity and chocolate notes out; excess calcium can mute them.
- Alkalinity acts as a buffer. High alkalinity water (common in the U.S. Midwest and Southwest) neutralizes coffee's natural acidity, which is why the same beans taste duller in hard-water cities.
A practical target is roughly 75-125 ppm TDS with moderate hardness. You do not need a lab kit to get close. Options, cheapest to most precise:
- Filtered tap water (carbon filter pitcher or under-sink filter) removes chlorine and some sediment, the single biggest improvement most people can make.
- Bottled spring water with a stated mineral content is a reliable middle ground if your tap is very hard or very soft.
- Third-wave water packets or mineral drops let you build brewing water from distilled or RO water to a specific TDS, a pro-level move worth trying once the rest of your routine is dialed in.
Specialty Coffee Association water standards is the reference most roasters cite if you want the full breakdown.
A Quick Diagnostic
| Symptom | Likely Water Cause | Fix |
|---|---|---|
| Flat, lifeless cup | Water too soft (low TDS) | Switch to spring water or add minerals |
| Dull, muted acidity | High alkalinity | Use filtered or low-alkalinity water |
| Chalky or soapy taste | Very hard water | Carbon filter or bottled spring water |
| Chlorine or pool smell | Unfiltered tap | Carbon filter |
Change one variable at a time. If you swap water and grind in the same week, you will not know which one helped.
Troubleshooting Flavor: Sour, Bitter, or Weak
Most off flavors trace back to extraction. Sourness usually means under-extraction, so the water did not pull enough from the grounds. Bitterness usually means over-extraction, so it pulled too much.
Here is a quick fix table:
| Taste | Likely Cause | Fix |
|---|---|---|
| Sour | Grind too coarse, water too cool | Grind finer, raise temp |
| Bitter | Grind too fine, steeped too long | Grind coarser, shorten time |
| Weak | Too little coffee | Add coffee or reduce water |
| Muddy | Too many fine particles | Upgrade to a burr grinder |
Change one variable at a time. If you adjust grind and ratio together, you will not know which one helped.
Budget Gear vs. Premium Gear: What Actually Matters
You do not need a full setup to brew great coffee, but you do need to spend money in the right order. Most beginners buy a fancy brewer first and a cheap grinder second, backwards. The grinder controls extraction more than any other gear, so it earns the first upgrade.
The Starter Kit (Under $100)
You can brew genuinely good coffee with four items:
- A hand burr grinder, Hario Skerton, Timemore C2, or 1Zpresso Q2. These beat electric blade grinders and most sub-$100 electric burr grinders on consistency.
- A digital scale accurate to 0.1 g, any basic kitchen scale works.
- A brewer, a plastic V60 cone, a Melitta pour-over cone, or a 3-cup French press, all under $25.
That setup covers pour-over, French press, and immersion brewing. It will out-brew a $300 drip machine paired with pre-ground coffee.
The Mid-Tier Upgrade ($100-$300)
Once the starter kit feels limiting, these upgrades actually change the cup:
- Electric burr grinder (Baratza Encore, Fellow Ode, or similar), the biggest single quality jump for most home brewers; consistent grind means consistent extraction.
- Temperature-controlled gooseneck kettle, removes guesswork on brew temp and improves pour control.
- Better brewer, a glass or ceramic V60, Kalita Wave, or Chemex. Mostly ritual and heat retention, not a huge flavor leap.
The Premium Tier ($300+)
Past this point you are buying refinement, repeatability, and convenience more than raw quality:
- High-end electric grinders with flat burrs (Fellow Ode Gen 2, Niche Zero, DF64), noticeably better clarity, especially for light roasts.
- Espresso machines, a separate hobby with its own learning curve. Do not buy one expecting it to replace your pour-over routine.
- Precision scales with timers and flow-rate readouts, useful for espresso and competition-style pour-over, overkill for daily drip.
What Matters Less Than People Think
- Expensive brewers with digital displays, the coffee does not know how much the machine cost.
- A wall of gear you never use, one good brewer beats five mediocre ones.
- Fancy cups and servers, nice to have, not a flavor upgrade.
Sustainability: The Angle Most Guides Skip
Coffee gear has a waste footprint, and it is easy to reduce without sacrificing quality:
- Reusable filters, stainless steel or cloth filters for pour-over and drip cut paper waste entirely. Cloth (like a Chemex Coffeesock or cotton V60 filter) needs rinsing and occasional boiling, but lasts months.
- Composting grounds, spent grounds are nitrogen-rich and break down quickly; add them to a compost bin, worm farm, or garden bed. Avoid the sink, where they clog pipes.
- Whole bean over pods, single-serve pods generate far more packaging waste per cup, and the coffee is usually older.
Our own lineup reflects this approach. The Good Morning Blend works well in a drip machine, while the Ethiopian Yirgacheffe shines in a pour-over where you can taste the stone fruit notes. For a fuller body, the Sumatra Mandheling holds up in a French press. If espresso is your ritual, the Abundant Espresso is built for it.
Frequently Asked Questions
What is the best way to make fresh coffee at home?
The best approach combines freshly roasted beans, a burr grinder, and a method that matches your routine. If you want control and clarity, pour-over gives you precise extraction. If you prefer simplicity, a drip machine works well when you use the right coffee-to-water ratio and grind size. What matters most is grinding right before brewing and using water between 90°C and 96°C to brew fresh coffee that tastes clean and balanced.
How many scoops of coffee should I use per cup?
A standard scoop is about 2 tablespoons of ground coffee, which equals roughly 10 to 12 grams. For a 240 ml cup, use 1 to 2 scoops depending on how strong you like it. The gold standard is 1 to 2 tablespoons per 180 ml of water. Weighing your coffee gives more consistent results than scooping, since grind size and bean density affect how much fits on a spoon.
Should you grind coffee beans right before brewing?
Yes. Ground coffee loses aromatic compounds within minutes of grinding because the increased surface area exposes oils to oxygen. Grinding right before brewing preserves the flavors that make specialty coffee worth the effort. A burr grinder produces more even particles than a blade grinder, which leads to better extraction.
What water temperature is best for brewing coffee?
The ideal range is 90°C to 96°C. Water that is too hot extracts bitter compounds and can scald the grounds. Water that is too cool leaves you with sourness and weak flavor because the extraction stalls. If you do not have a temperature-controlled kettle, boil water and let it rest for 30 to 45 seconds before pouring. For dark roasts, aim closer to 90°C, and for light roasts, go nearer 96°C.
Brewing a truly great cup at home comes down to a handful of choices: fresh beans, the right grind, a sensible ratio, and water that is hot enough. Get those right and the method matters far less than most guides suggest. EverGrace Coffee roasts premium specialty beans, from signature blends to single origins, and pairs every purchase with a purpose-driven mission. Shop all Coffee and start your next morning with something worth slowing down for.